Gmail SMTP is an advanced SMTP mailing plugin for WordPress for sending an email via Gmail SMTP server. Unlike most SMTP plugins It uses the OAuth 2.0 protocol to authorize access to the Gmail API instead of password authentication.

Gmail SMTP Benefits
1. Gmail SMTP plugin does not store your password. It uses the OAuth 2.0 mechanism for SMTP authentication. It means a more secure login system for users.
2. Gmail SMTP plugin uses PHPMailer – a very popular PHP library used in the core WordPress for sending an email. This is to make sure that users can still get full benefits of the default email functionality.
3. Gmail SMTP plugin takes a big headache away from you because you no longer need to Allow Less Secure Apps on your Gmail account. This is an option that users had to enable in order to fix SMTP connection issue. This issue went viral from December 2014, when Google started imposing OAuth 2.0 authentication to access their apps. This option affects SMTP mailing because applications that perform password authentication to IMAP, POP, or SMTP are considered Less Secure Apps.
As far as I know, this issue still affects almost all the SMTP plugins out there.
How OAuth 2.0 Authorization Works
1. You register a web application in the Google Developers Console.
2. When this application is launched it requests that you give it access to data in your Google account.
3. If you consent, the application receives credentials to access the API.
Installation
- Go to Plugins->Add New Plugin from your WordPress admin dashboard
- Search for “gmail smtp naa986”
- Click Install once you have found it
The plugin can also be downloaded from here: https://wordpress.org/plugins/gmail-smtp/. For a manual installation go to Plugins > Add New Plugin > Upload Plugin and select the zip file that you downloaded.
Gmail SMTP Configuration
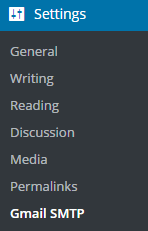
In order to get started with the plugin go to Settings->Gmail SMTP from your admin dashboard.
Gmail SMTP Project Creation
1. Go to console.cloud.google.com/apis/dashboard.
2. Login to your Google account which will be used to send an email.
3. Create a new project where your application will be registered.
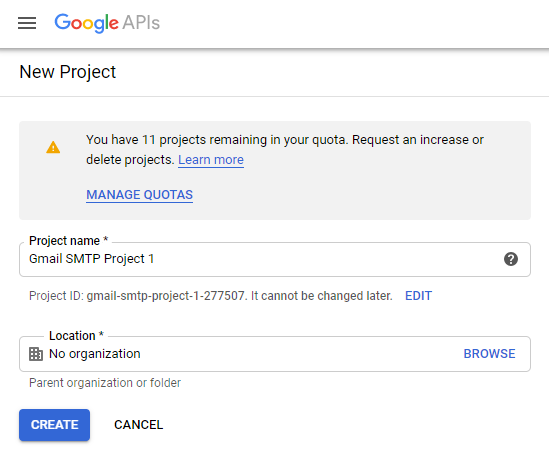
It doesn’t have to be “Gmail SMTP Project 1”. You can name it whatever you like. I chose a meaningful name because I have multiple projects in it.
Credentials/App Creation
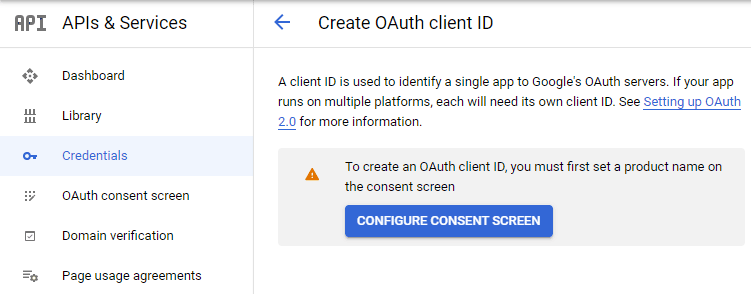
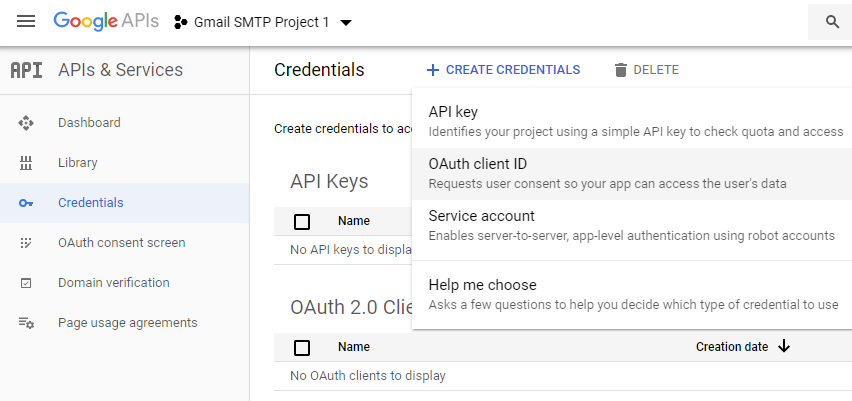
1. Once the project is created go to Credentials > CREATE CREDENTIALS and select OAuth client ID.
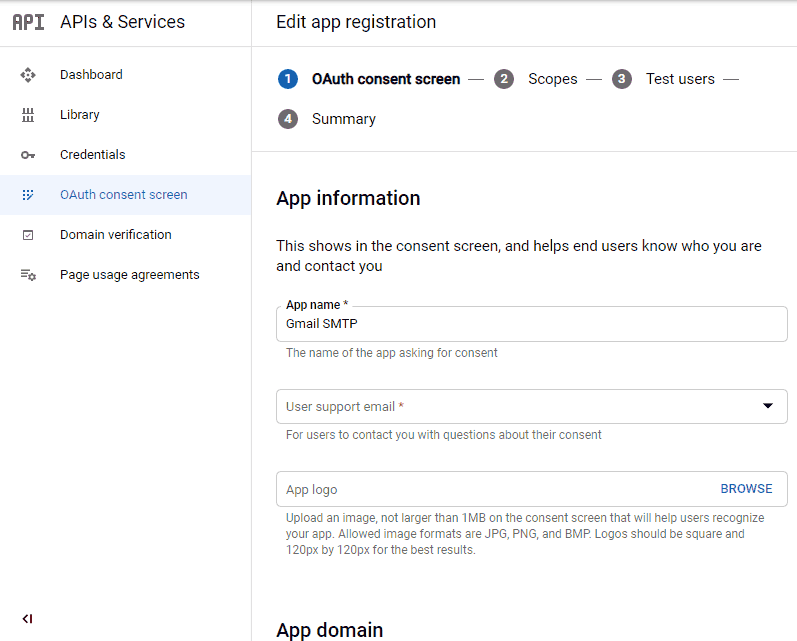
2. In order to create an OAuth client ID, you need to configure the OAuth consent screen first. So click CONFIGURE CONSENT SCREEN.
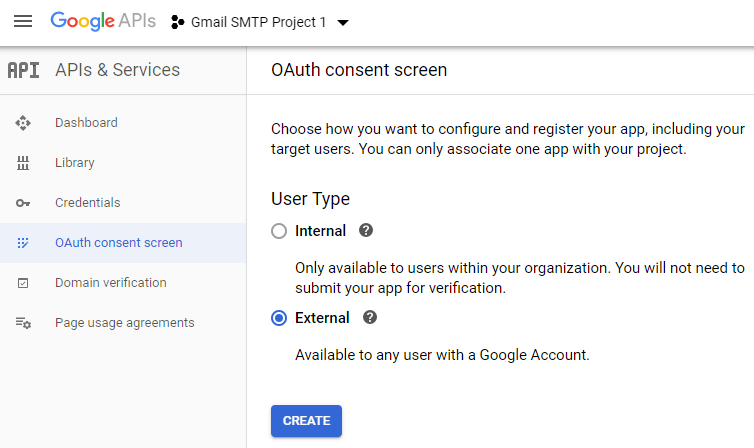
3. Choose how you want to configure and register your app. Since I’m not using G Suite I had to choose External.
4. Enter a name (e.g. Gmail SMTP) for the OAuth consent screen.
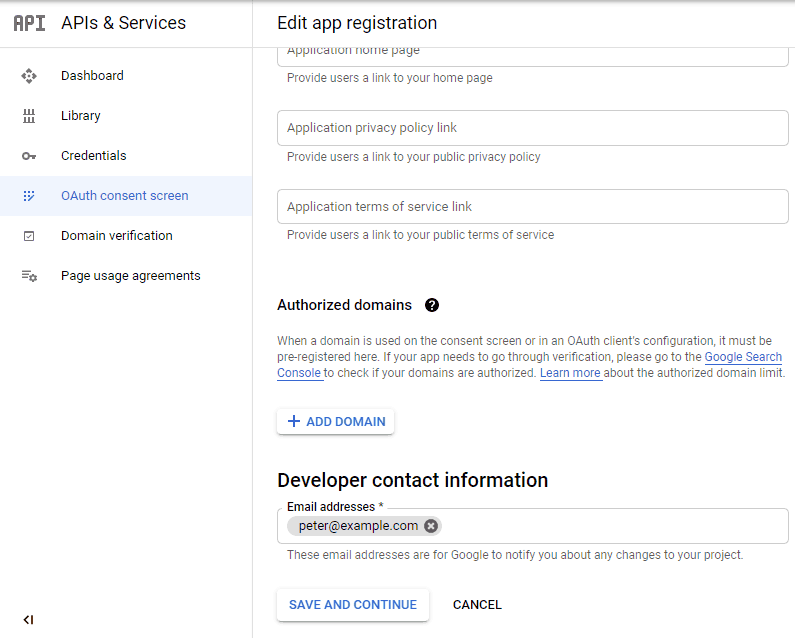
5. You can configure optional fields such as Authorized domains, Application home page, Application privacy policy link and Application terms of service link (I was able to skip all and click SAVE AND CONTINUE). You do however need to enter an email address under the Developer contact information section.
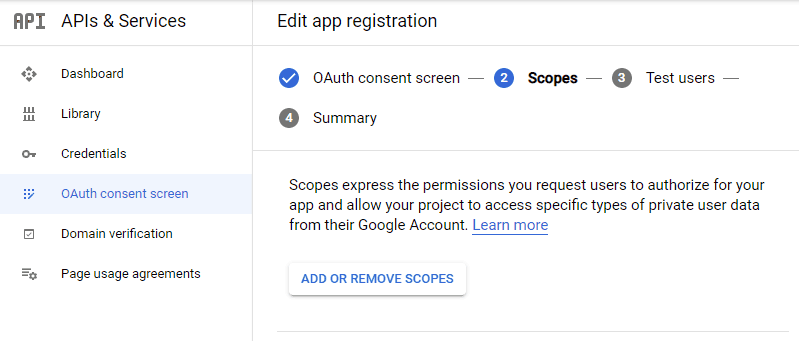
6. Skip the Scopes screen.
7. Add a test user if you plan to use this app in test mode (This is not required if you want to publish it).
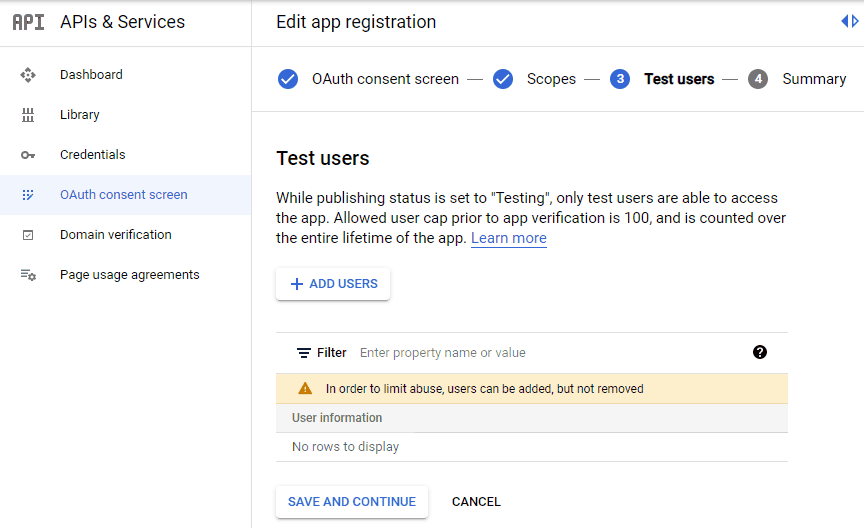
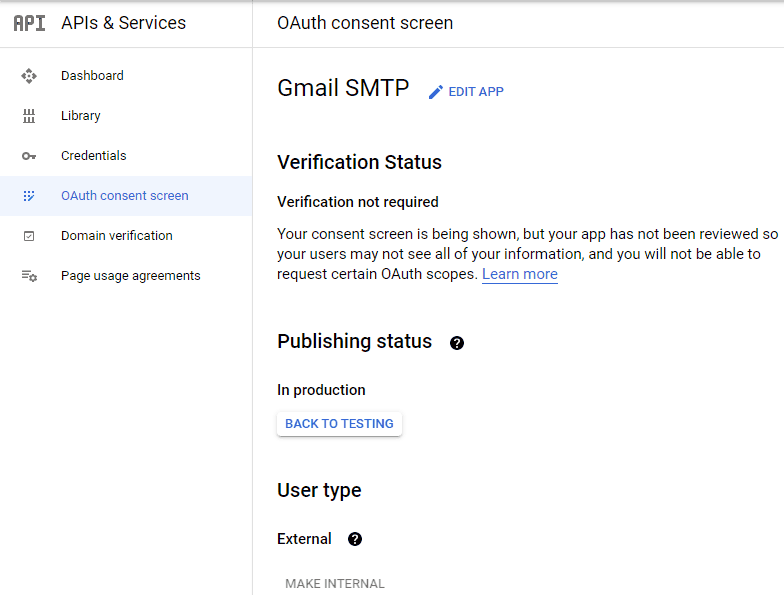
8. Keep your app in test mode or publish it. If the Publishing status is set to In production, a warning message (This app isn’t verified) may appear on the consent screen that you can easily skip.
Now that the OAuth consent screen has been configured you can create an OAuth Client ID.
9. Go to the Credentials tab and select OAuth client ID under CREATE CREDENTIALS.
10. Set the application type to Web application and enter a name for it (e.g. Gmail SMTP App). Copy the Authorized Redirect URL from the settings and paste it into the field here.
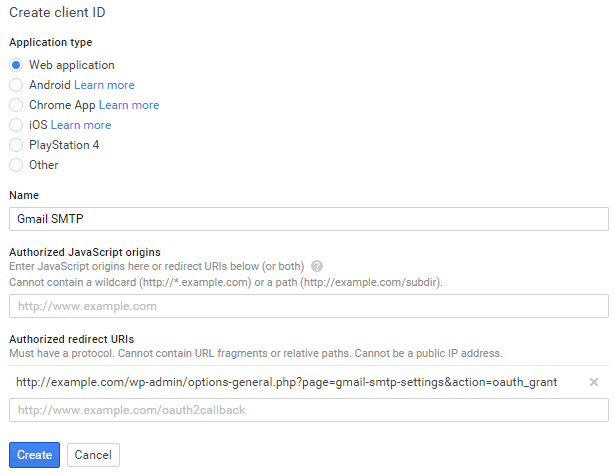
11. Click Create. This will generate a Client ID and Client Secret for you. Copy and paste them into the settings area of the plugin.
Gmail SMTP Settings Configuration
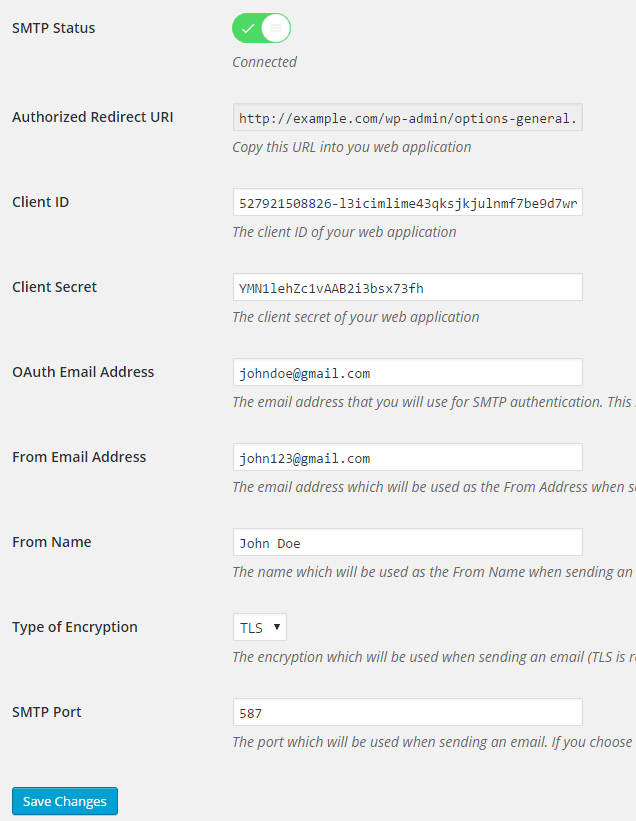
1. Configure the rest of the settings. It includes,
OAuth Email Address: The email address that you will use for SMTP authentication. This should be the same email used in the Google Developers Console.
From Email Address: The email address which will be used as the From Address when sending an email.
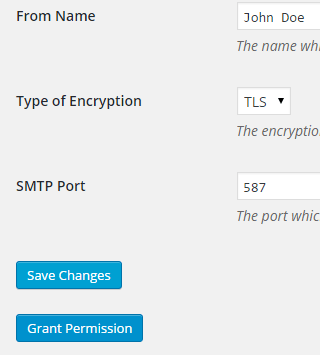
From Name: The name which will be used as the From Name when sending an email.
Type of Encryption: The encryption which will be used when sending an email (either TLS/SSL). By default, it should be set to TLS since SSL has been deprecated since 1998.
SMTP Port: The port which will be used when sending an email. If you choose TLS it should be set to 587. For SSL use port 465 instead.
2. Click Save Changes.
Now that you have configured the settings a Grant Permission button will appear.
3. Clicking on it will take you to a consent screen where you will be able to grant this app access to the Gmail API.
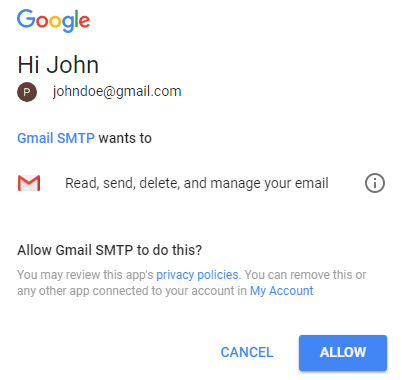
4. When you click Allow you will get redirected back to the plugin settings. You should see a message like Access Granted Successfully. The SMTP Status should also get set from Not Connected to Connected.
That’s it. Gmail SMTP plugin will now be able to take control of all outgoing email from your website.
Test Email
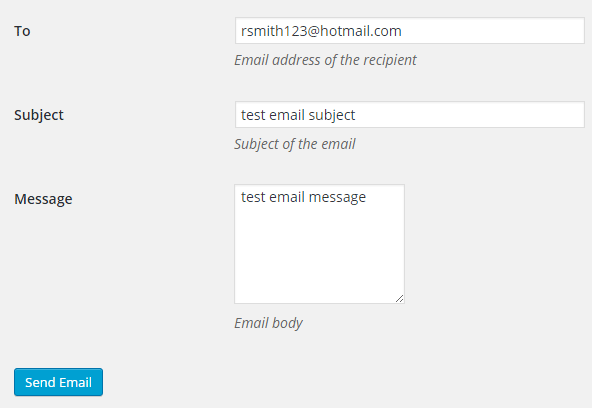
In order to test the email functionality, you can send a test email from the Test Email tab.
Debug option is enabled by default for the test email functionality – which means you would be able to see if the plugin was able to send the email without any error.
Troubleshooting
By default, your SMTP port should be configured on 587 (with TLS encryption). If you can’t get it to work then you can try changing it to 465 (with SSL encryption).
If you still can’t get either to work try port 25 with TLS first and then SSL. Please note that most servers don’t support encryption on port 25, which is why port 587 and 465 are the preferred options.
Authorization Error
If you click the Grant Permission button and get an authorization error (Error 403: access denied) please follow these steps:
Go to “Oauth consent screen” of your app.
Click “Add user” under “Test users”.
Add the email address corresponding to your google account.
This app isn’t verified
If you get the “This app isn’t verified” error simply click “Advanced” and continue.
smtp connect() failed
If you are connecting to the Gmail SMTP server for the first, you might get an error: smtp connect() failed or Could not authenticate.
This error usually occurs when Gmail blocks an SMTP connection made from an external server. This is not a configuration issue. Gmail does it time to time for security reasons. In order to fix this issue login to your Gmail account first. You should see a security warning from Gmail upon login – “Your account has been hacked” or “Somebody stole your password”. As soon as you confirm that it was you who tried to log in (Just click on the link that shows up in that message), the plugin should be able to connect to the Gmail SMTP server.
Error Invalid Scope
Google recently enhanced their risk assessment for new web applications that request user data. Based on this risk assessment, some web applications will require a manual review before users can approve data permissions. Until the review is complete, unverified apps will display an “invalid_scope” or some other random error messages when you go to the permissions consent page.
If you are getting this type of error when setting up the plugin you can join this Google group “Risky Access Permissions By Unreviewed Apps” (https://groups.google.com/forum/#!forum/risky-access-by-unreviewed-apps). This will automatically approve data access to the app from your account and you won’t have to go through their manual review process (which includes filling out a developer verification form). This automatic approval process is permissible by Google for testing/personal use/sending email through WordPress Plugins/similar single-account SMTP usage (See this page for more details – https://support.google.com/code/contact/oauth_app_verification).
Error This app isn’t verified
If you see this error when trying to authorize your app to read, send, delete, and manage your email, you can manually get around the error screen. See “OAuth Client Verification” (https://developers.google.com/apps-script/guides/client-verification) for details.
Error refreshing the OAuth2 token
This is an intermittent issue that seems to occur on some servers. When you get this error, it means that the plugin is not being able to refresh the OAuth2 token using the secret access key. It is required by the App that you created in your account to access the Gmail API. Usually, the issue goes away when you delete the existing secret access key from the database and do a fresh authorization. For details please check the “Fresh Authorization” section.
OpenSSL Certificate Verification Failure
As of PHP 5.6, you will get the following error/warning if the SSL certificate on the server is not properly configured:
Warning: stream_socket_enable_crypto(): SSL operation failed with code 1. OpenSSL Error messages: error:14090086:SSL routines:SSL3_GET_SERVER_CERTIFICATE:certificate verify failed
In order to fix this issue, your web host needs to replace this invalid, misconfigured or self-signed certificate with a good one. The other alternative is to check this option in the settings so PHP doesn’t verify the certificate – “Disable SSL Certificate Verification”. That said, I wouldn’t recommend it since this change was made for a good reason.
We do not authorize the use of this system to transport unsolicited, 220 and/or bulk e-mail
Peer certificate CN=’example.com’ did not match expected CN=’smtp.gmail.com’
One of these errors is usually seen when your web server tries to connect to a different remote server instead of smtp.gmail.com. This can be easily found by checking the debug line where the server is communicating with the remote client. For example,
2017-10-10 00:16:56 SERVER -> CLIENT: 220-example.com ESMTP Exim
Why does this issue occur?
You may have this setting on your web server – “Restrict outgoing SMTP to root, exim, and mailman (FKA SMTP Tweak)” that is set to “YES”. It needs to be “NO”.
If you are not sure, contact your web host instead of making any changes so they can troubleshoot this issue for you.
Fresh Authorization / Removing Access From the Application
For some reason, if you ever want to stop using this plugin or do a fresh authorization this option might come in handy.
Revoke Access menu allows you to remove access from a previously authorized application.
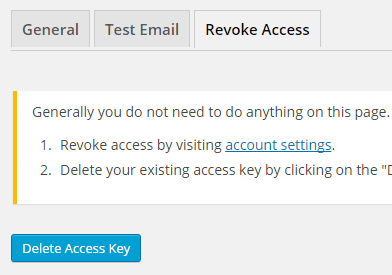
First, you need to click on the account settings link. This will take you to a page where you can remove access from the Gmail SMTP application.
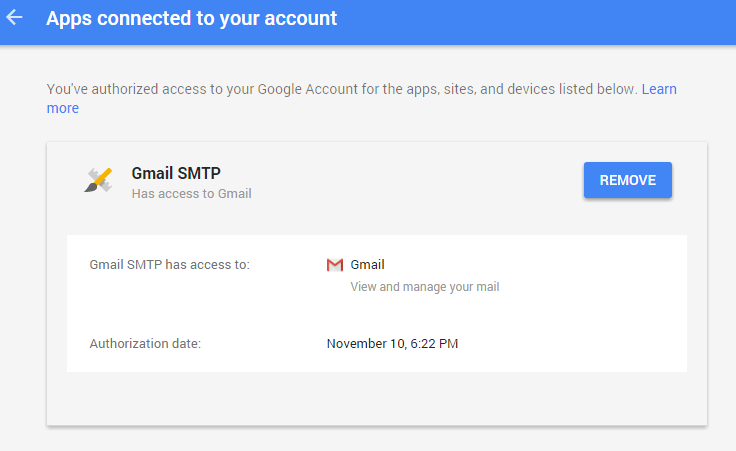
Once you have removed access from it, go back to the Remove Access tab in the plugin settings and delete the Access key.
Access key is a token that the plugin received when you first granted your app access to the Gmail API. This token is necessary to communicate with the Gmail API and send an email. In order to avoid any confusion, the plugin does not show it on the settings page.
Once you delete this token the plugin can no longer connect to the Gmail SMTP server or send an email. This means you will need to reauthorize (using the web application link in the settings) before you can start using the plugin again. However, you won’t need to set up everything from scratch as long as the project still exists in your Google Developers Console.
Gmail SMTP Add-ons
Gmail SMTP plugin comes with add-ons that you can use to enhance its functionality on your website.
Reply-To
Reply-To add-on lets you set a reply-to address for all outgoing email messages.
Cc
Cc add-on lets you set a cc recipient for all outgoing email messages.
Email Logger
Email Logger add-on lets you log and view all email messages sent by Gmail SMTP.
Get All Gmail SMTP Add-ons

* Reply-To
* Cc
* Email Logger
License: Unlimited Websites
Note:
* Do not purchase before setting up the core plugin first. The add-on is not at fault if the core plugin does not work on your website.
* Do not purchase if you are not sure about a feature, contact us instead.
* Do not purchase to ask for more features or make the product work in a certain way.
The best guide for Gmail SMTP Plugin for WordPress, it works. Thank you.
Hi,
I got the following error message when I test sending email using the plugin:
2025-06-02 22:15:33 Connection: opening to smtp.gmail.com:587, timeout=300, options=array()
2025-06-02 22:15:33 Connection: opened
2025-06-02 22:15:33 SMTP INBOUND: “220 smtp.gmail.com ESMTP d2e1a72fcca58-747afeaad78sm8083521b3a.46 – gsmtp”
2025-06-02 22:15:33 SERVER -> CLIENT: 220 smtp.gmail.com ESMTP d2e1a72fcca58-747afeaad78sm8083521b3a.46 – gsmtp
2025-06-02 22:15:33 CLIENT -> SERVER: EHLO youws.com
2025-06-02 22:15:33 SMTP INBOUND: “250-smtp.gmail.com at your service, [162.241.225.177]”
2025-06-02 22:15:33 SMTP INBOUND: “250-SIZE 35882577”
2025-06-02 22:15:33 SMTP INBOUND: “250-8BITMIME”
2025-06-02 22:15:33 SMTP INBOUND: “250-STARTTLS”
2025-06-02 22:15:33 SMTP INBOUND: “250-ENHANCEDSTATUSCODES”
2025-06-02 22:15:33 SMTP INBOUND: “250-PIPELINING”
2025-06-02 22:15:33 SMTP INBOUND: “250-CHUNKING”
2025-06-02 22:15:33 SMTP INBOUND: “250 SMTPUTF8”
2025-06-02 22:15:33 SERVER -> CLIENT: 250-smtp.gmail.com at your service, [162.241.225.177]250-SIZE 35882577250-8BITMIME250-STARTTLS250-ENHANCEDSTATUSCODES250-PIPELINING250-CHUNKING250 SMTPUTF8
2025-06-02 22:15:33 CLIENT -> SERVER: STARTTLS
2025-06-02 22:15:33 SMTP INBOUND: “220 2.0.0 Ready to start TLS”
2025-06-02 22:15:33 SERVER -> CLIENT: 220 2.0.0 Ready to start TLS
2025-06-02 22:15:33 CLIENT -> SERVER: EHLO youws.com
2025-06-02 22:15:33 SMTP INBOUND: “250-smtp.gmail.com at your service, [162.241.225.177]”
2025-06-02 22:15:33 SMTP INBOUND: “250-SIZE 35882577”
2025-06-02 22:15:33 SMTP INBOUND: “250-8BITMIME”
2025-06-02 22:15:33 SMTP INBOUND: “250-AUTH LOGIN PLAIN XOAUTH2 PLAIN-CLIENTTOKEN OAUTHBEARER XOAUTH”
2025-06-02 22:15:33 SMTP INBOUND: “250-ENHANCEDSTATUSCODES”
2025-06-02 22:15:33 SMTP INBOUND: “250-PIPELINING”
2025-06-02 22:15:33 SMTP INBOUND: “250-CHUNKING”
2025-06-02 22:15:33 SMTP INBOUND: “250 SMTPUTF8”
2025-06-02 22:15:33 SERVER -> CLIENT: 250-smtp.gmail.com at your service, [162.241.225.177]250-SIZE 35882577250-8BITMIME250-AUTH LOGIN PLAIN XOAUTH2 PLAIN-CLIENTTOKEN OAUTHBEARER XOAUTH250-ENHANCEDSTATUSCODES250-PIPELINING250-CHUNKING250 SMTPUTF8
2025-06-02 22:15:33 Auth method requested: XOAUTH2
2025-06-02 22:15:33 Auth methods available on the server: LOGIN,PLAIN,XOAUTH2,PLAIN-CLIENTTOKEN,OAUTHBEARER,XOAUTH
2025-06-02 22:15:33 CLIENT -> SERVER: QUIT
2025-06-02 22:15:33 SMTP INBOUND: “221 2.0.0 closing connection d2e1a72fcca58-747afeaad78sm8083521b3a.46 – gsmtp”
2025-06-02 22:15:33 SERVER -> CLIENT: 221 2.0.0 closing connection d2e1a72fcca58-747afeaad78sm8083521b3a.46 – gsmtp
2025-06-02 22:15:33 Connection: closed
There has been a critical error on this website. Please check your site admin email inbox for instructions. If you continue to have problems, please try the support forums.
Any idea?
Thanks,
King
@Qing, Has something changed on the server recently or in your Google account?
i had the sameissue
it works for the first domain like a charm. During setup I added the other domain (other WP install on the same server) but get the error :
SMTP ERROR: QUIT command failed: 535-5.7.8 Username and Password not accepted.
I don’t understand why.
Thanks,
Vincent
@Vincent, We recommend a separate app for each site.
ok, thanks for so quick feedback.
Hello!
After finishing the process I get the following WordPress error:
“The has been a critical error on your website”
SMTP Status still says “Not Connected”
Can you help? 🙂
Thanks
Andrea
@andrea, The server log should show what error occurred. You can send more details using the contact form on the site.
none of this matches the real screens
Hi! It´s time to renew the tutorial it dosn´t match the options in Gmail SMTP.
Hello Sir,
When I hit “Grant Permission” I always get error 400: redirect_uri_mismatch.
In error details it shows redirect_uri=Request details:
redirect_uri=https://mywebsite.nl/wp-admin/options-general.php?page=gmail-smtp-settings&action=oauth_grant flowName=GeneralOAuthFlowAnd when I input this in the google cloud it says invalid redirect: cannot contain whitespace
So I replace the blank with %20 resulting in
Request details:
redirect_uri=https://fiddlersfarm-stichting.nl/wp-admin/options-general.php?page=gmail-smtp-settings&action=oauth_grant%20flowName=GeneralOAuthFlowBut the error remains the same when I hit “Grant Permission” again.
Any help you can offer?
Thank you so much,
Humphrey