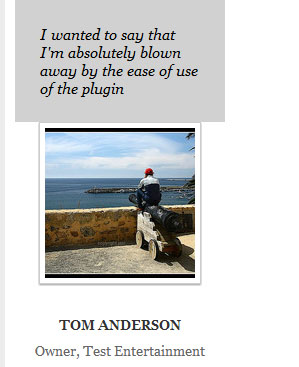
WP Elegant Testimonial is an easy-to-use WordPress Testimonial Plugin to insert testimonials to a post or page. There is no limit to the number of testimonials you can use on a specific page. You can insert as many testimonials as you want using shortcodes.
Features
- Flexibility of inserting testimonials to a WordPress post or page
- Testimonials are customizable
- User-friendly shortcodes for creating WordPress testimonials
- Display WordPress testimonials using tooltip
- Give professional look to your WordPress blog
Plugin Installation
- Login to your WordPress admin dashboard
- Go to Plugins->Add New
- Enter Elegant Testimonial in the search box
- Once you find the plugin hit the install button
Setup
You can download the .zip file and upload it via WordPress Plugin Uploader. Once you have successfully uploaded it hit Activate Now.
Step-1: Once you have installed the WordPress testimonial plugin create a new post/page on your WP Dashboard.
Step-2: Now embed the following shortcode on the new post/page you just created:
[wp_elegant_testimonial name="Customer Name" company="Customer's company" text="Customer's testimonial" image="Customer's image"]
Step-3: Replace the value of each shortcode parameter with your customer’s information. For example:
- name=”customer’s name goes here”
- company=”customer’s company goes here”
- text=”customer’s testimonial goes here”
- image=”customer’s image goes here”
And you are done! You can now Publish the post/page and view the testimonial you just created.
Demo Screenshots

Text is displayed when a user hovers over the image.

Hello, does it absolutely require the use of “short codes” as i am a novice, and, would like to be able to install and use the plugin without any programming requrements. Thank you
Hi, shortcodes don’t actually require any programming knowledge. All you have to do is just use one parameter and customize the text. You don’t even have to switch to the HTML editor (you can do everything in the visual editor which is very user-friendly).
The plugin doesnt work for me… I just found an image and used snip-it to crop it, saved as an image file and stored in my PC directory and it wont show on my page… Only thing that shows is the cuystomer name and company name… The test wont show…
Does test only show as a tage to an image? If so, I inserted an image using the simple Page Editor– and nothing happened
Hi, can I take a look at the shortcode you are using?
Hello!
I am not sure, what i have do do in the “image gap” …. Could i just paste the link of my “image in my mediathek”? Or what have i to do to make wp show my photo correctly… ?
Greetings,
Birgit R.
Hi, you need to specify the full URL of the image in the “image” parameter of the shortcode. For example: image=”http://example.com/wp-content/uploads/thumbnail.jpg”
Wow, how fast this answer came!
I’m getting furious, am i so stupid? There ist already no photo…. can i show you my shortcode somewhere? Or any other ideas?
Sorry…
Hi, please post the full shortcode that you are using so I can take a look.
Here it is: Don’t lough… I’m just started with WordPress……
[wp_elegant_testimonial name=”biggi” company=”mit daniel” text=”wir lieben das tragetuch!” image=”http://www.geburt-ev.de/wordpress/wordpress/wp-admin/post.php?post=561&action=edit”]
Its the mojo “in care ” theme and i have pasted it on a “testimonial”- page… should i prefer to create a site instead?
“http://www.geburt-ev.de/wordpress/wordpress/wp-admin/post.php?post=561&action=edit” is not actually an image URL. Have you uploaded your image using WordPress Media Uploader?
yes, with the included uploader..
not the right way?
I have to google “image url” i think….
Oh..i have to use the short permalink, haven’t I ? Hmm.. still no picture..
Hi, please go to “Media->Library” from your WP Dashboard and click “Edit” under that image. That will show you more information about the image. Now look for a field called “File URL” on the very right corner of your screen. That’s where you will find the full URL of that image. Now copy the URL and paste it in the shortcode.
Note: You should always try to enter the URL in the browser address bar to make sure that it’s a valid URL.
Let me now how that goes.
Hello again ….
Hmm, at the right sight, I can see an URL. but i can’t paste it completly in my shortcode. (forbidden….?). When i paste the “permalink” which works in my browser, there is a testimonial without a picture… Any Idea?
Edit: I have found the correct URL… But a picture isn’t at my testi….
Hi,
I have been trying to add a picture into the page and it will not upload. The link does work. Any suggestions?
Thank you for any help.
Just a quick question is there a way I can define where the testimonial appears in relation to the thumbnail. At the moment it appears on the top but unfortunately get cut under the page header, is there a way I can get it to appear on the right or bellow of the image?
Is this plugin fully responsive? I tried this plugin on my website and then my site got broken on mobile devices. Then I tried GS Testimonial Slider and it worked for me. Did I make anything wrong while installing WP Elegant Plugin?
@James, It’s an old plugin. So the popup may not be responsive.
Among the features of this wordpress-testimonial -plugins , Every thing will be will be ok . And hopefully these features add more effectiveness also .