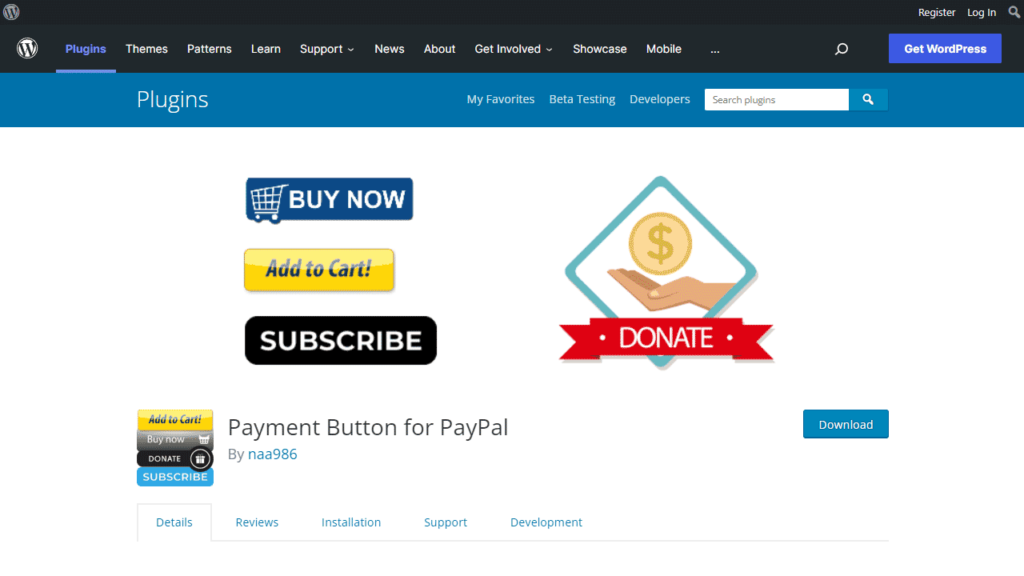
Payment Button for PayPal (also known as WP PayPal) plugin connects PayPal to your WordPress site and makes e-commerce available for you. With the WordPress PayPal plugin, you can create various types of buttons such as Add to Cart, Buy Now, Donation or Subscription with a simple shortcode to accept PayPal payments from your users. This plugin allows both one-time and recurring subscription payments so you can run your online store with great ease.
Payment Button for PayPal plugin uses the PayPal API to create a checkout process for your customer that is fast, easy, and intuitive. With one simple shortcode, you can add a secure payment button to your website that lets you accept credit card, debit card, and PayPal payments from any mobile device, tablet, or PC.
Note: This is NOT an official PayPal product.
Features
- Accept PayPal and PayPal Credit payments
- No monthly fee
- Accept credit cards and debit cards
- Optimized mobile checkout experience
- Accept one-time or recurring payments
- Simplified PCI compliance
- Accept donations
- OneTouchTM enables checkout with a click of a button
- Accept 25 currencies from over 200+ countries and markets
- Accept PayPal Pay Later (Pay in 4) payments
- Accept payments with PayPal smart payment buttons
- Accept PayPal Checkout payments (previously known as Express Checkout)
How to Install Payment Button for PayPal in WordPress
- Login to your WordPress admin dashboard
- Go to Plugins->Add New Plugin
- Enter Payment Button for PayPal naa986 in the search box
- Once you find the plugin hit the install button
The plugin can also be downloaded from here: https://wordpress.org/plugins/wp-paypal/. For a manual installation go to Plugins > Add New Plugin > Upload Plugin and select the zip file that you downloaded.
How to Configure Payment Button for PayPal in WordPress
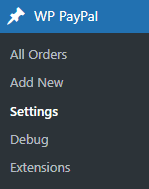
Once you have installed the plugin you will be able to access the settings by navigating to “WP PayPal -> Settings”.
General Settings
In the general settings area, you will need to configure some options related to your PayPal merchant account.
The settings area shows options for both PayPal Checkout and PayPal Payments Standard payment methods.
PayPal Checkout Settings
These settings apply to the “[wp_paypal_checkout]” shortcode. It uses PayPal Checkout payment method to add smart payment buttons to your website. To use PayPal Checkout, REST API credentials are required. To Generate REST API credentials for the sandbox and live environments:
- Log in to the Developer Dashboard with your PayPal account credentials.
- On My Apps & Credentials, use the toggle to switch between live and sandbox testing apps (If you are creating a Sandbox app, you will also need to select a test business account that will act as the API caller).
- Navigate to the REST API apps section and click Create App.
- Type a name for your app and click Create App. The app details page opens and displays your credentials.
- Copy and save the client ID and secret for your app.
- Review your app details and save your app.
Once you have the Client ID you can enter it in the plugin settings.
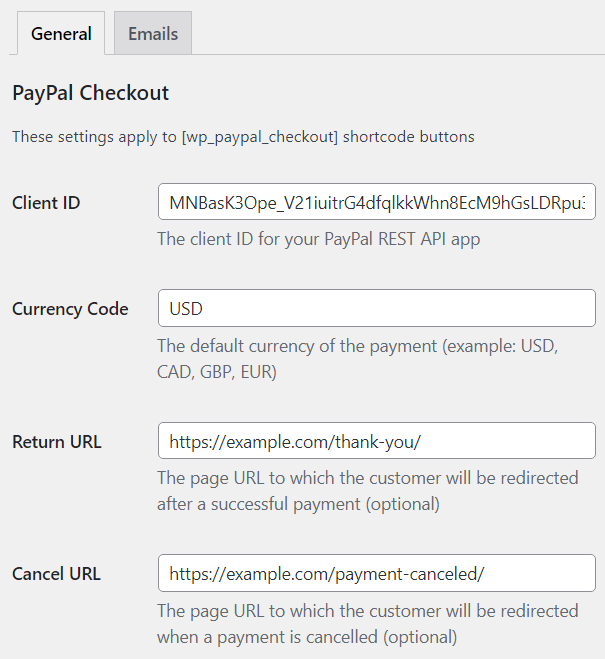
You can also configure the following options.
Currency Code: The default currency of the payment
Return URL: The URL to which customers will be redirected after payments.
Cancel URL: The URL to which customers will be redirected when payments are cancelled.
Enabled Funding Sources: Funding sources that you wish to display as buttons at checkout. This is not required as the eligibility is determined automatically. However, this field can be used to ensure a funding source is always rendered, if eligible.
You can enter one or more sources in comma-separated format. Here are the supported values:
| Funding Source | Description |
|---|---|
| card | Credit or debit cards |
| credit | PayPal Credit (US, UK) |
| paylater | Pay Later (US, UK), Pay in 4 (AU), 4X PayPal (France), Später Bezahlen (Germany) |
| bancontact | Bancontact |
| blik | BLIK |
| eps | eps |
| giropay | giropay |
| ideal | iDEAL |
| mercadopago | Mercado Pago |
| mybank | MyBank |
| p24 | Przelewy24 |
| sepa | SEPA-Lastschrift |
| sofort | Sofort |
| venmo | Venmo |
Disabled Funding Sources: Funding sources that you do not wish to display as buttons at checkout. You can enter one or more sources in comma-separated format. Here are the supported values:
| Funding Source | Description |
|---|---|
| card | Credit or debit cards |
| credit | PayPal Credit (US, UK) |
| paylater | Pay Later (US, UK), Pay in 4 (AU), 4X PayPal (France), Später Bezahlen (Germany) |
| bancontact | Bancontact |
| blik | BLIK |
| eps | eps |
| giropay | giropay |
| ideal | iDEAL |
| mercadopago | Mercado Pago |
| mybank | MyBank |
| p24 | Przelewy24 |
| sepa | SEPA-Lastschrift |
| sofort | Sofort |
| venmo | Venmo |
PayPal Payments Standard Settings
These settings apply to the “[wp_paypal]” shortcode. It uses PayPal Payments Standard payment method to create different types of buttons such as buy now, add to cart, donate, subscribe etc.
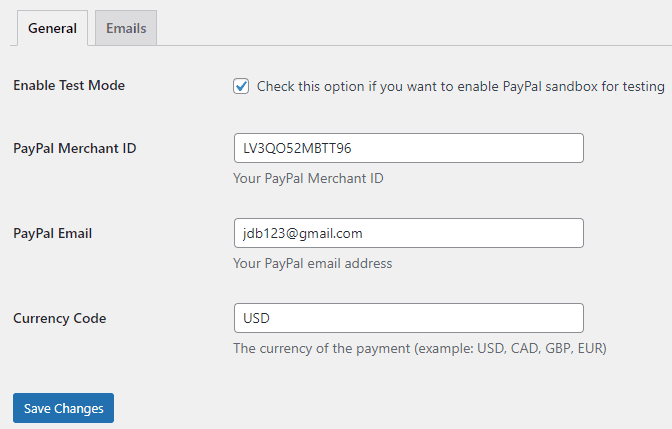
Click on the “Save Changes” button when you are done.
Email Settings
In the email settings area, you can choose to configure some email related settings.
Email Sender Options
In this section, you can specify a From Name and From Email Address that will be used by the WP PayPal plugin when sending an email. You can leave them empty to use the default.

Purchase Receipt Email
WP PayPal plugin allows you to send a purchase receipt email to the customer after completion of a successful purchase. By default, this feature is disabled. In order to use this feature, you need to enable it in the settings.
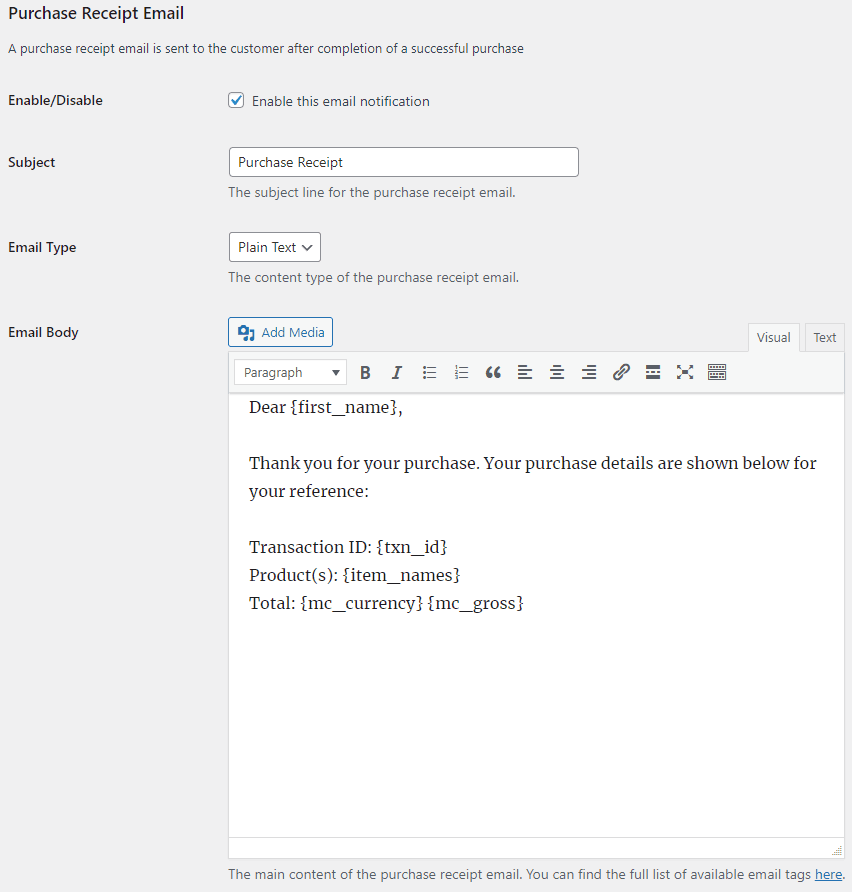
You can customize the following options in the purchase receipt email,
- Purchase Receipt Email Subject: The subject line for the purchase receipt email. You can use various tags in the email subject to dynamically change its content when it is sent.
- Purchase Receipt Email Type: The content type of the purchase receipt email (Plain Text/HTML).
- Purchase Receipt Email Body: The main content of the purchase receipt email. You can use various tags in the email body to dynamically change its content when it is sent.
Sale Notification Email
WP PayPal plugin can send a sale notification email to your chosen recipient after completion of a successful purchase. By default, this feature is disabled. In order to use this feature, you need to enable it in the settings.
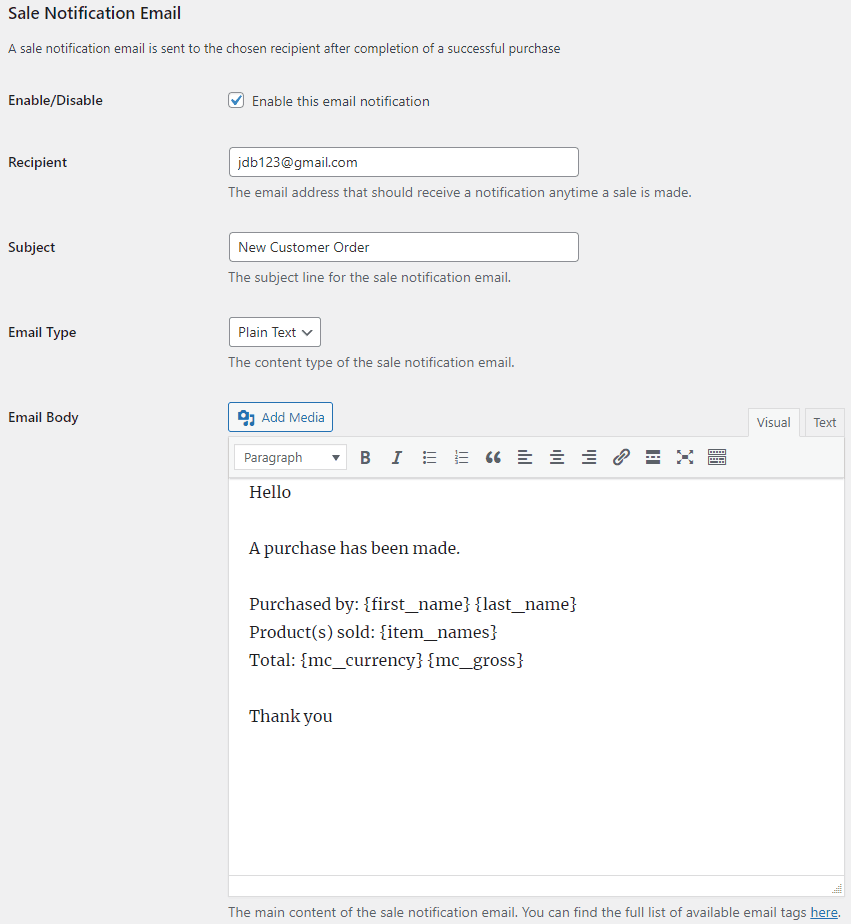
You can customize the following options in the sale notification email,
- Sale Notification Email Recipient: The email address that should receive a notification anytime a sale is made.
- Sale Notification Email Subject: The subject line for the sale notification email. You can use various tags in the email subject to dynamically change its content when it is sent.
- Sale Notification Email Type: The content type of the sale notification email (Plain Text/HTML).
- Sale Notification Email Body: The main content of the sale notification email. You can use various tags in the email body to dynamically change its content when it is sent.
Email Tags
The following email tags can be used in the email subject/body to dynamically change its content when an email is sent,
{first_name} – The customer’s first name.
{last_name} – The customer’s last name.
{txn_id} – The unique transaction ID for this purchase.
{item_names} – The name(s) of the product purchased.
{mc_currency} – The currency code used to make the payment.
{mc_gross} – The full amount of the customer’s payment.
{payer_email} – The customer’s email address.
{custom} – A pass-through custom variable for your own tracking purposes.
{shipping_address} – The customer’s shipping address.
{variation} – The variation of the product purchased.
{threedigitdiffrandnum} – A random 3 digit number. The generated numbers will be unique if the tag occurs multiple times in a single email message.
PayPal Checkout
With the PayPal Checkout payment method (previously known as PayPal Express Checkout), you can create smart payment buttons to accept one-time payments with our plugin.
To create a button, add a shortcode block from your WordPress post/page editor and insert the following shortcode into it.
[wp_paypal_checkout description="test checkout product" amount="3.99"]
Publish/update the page and you will see the button on the front end.
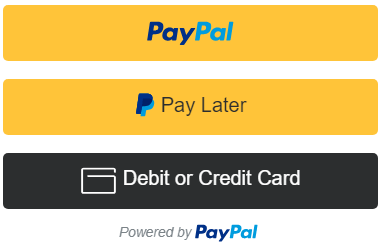
PayPal Checkout Shortcode Parameters
The “wp_paypal_checkout” shortcode currently supports the following parameters.
description
A description of the purchase.
amount
The price of the product.
return_url
The URL to which the customer is redirected after a successful payment.
[wp_paypal_checkout description="test checkout product" amount="3.99" return_url="https://example.com/thank-you/"]
cancel_url
The URL to which the customer is redirected after a payment is canceled.
[wp_paypal_checkout description="test checkout product" amount="3.99" cancel_url="https://example.com/payment-canceled/"]
layout
The layout of the buttons. Supported values: horizontal.
[wp_paypal_checkout description="test checkout product" amount="3.99" layout="horizontal"]
By default, buttons are stacked vertically.
color
The color of the PayPal button. Supported values: blue, silver, white, black.
[wp_paypal_checkout description="test checkout product" amount="3.99" color="blue"]
The default color is gold.
shape
The shape of the PayPal button. Supported values: pill.
[wp_paypal_checkout description="test checkout product" amount="3.99" shape="pill"]
The default is rectangular.
label
Additional label for the PayPal button. Supported values: checkout, buynow, pay.
[wp_paypal_checkout description="test checkout product" amount="3.99" label="checkout"]
The default is paypal.
Shipping Preference
The location from which the shipping address is derived. For example:
[wp_paypal_checkout description="test checkout product" amount="3.99" shipping_preference="NO_SHIPPING"]
The default is GET_FROM_FILE.
PayPal Checkout Add-ons
PayPal Checkout payment method comes with various add-ons that you can use to enhance its functionality on your website.
Variable Price
Variable Price add-on shows a price input field with your PayPal Checkout button. This lets buyers set the amount they wish to pay.
Mailchimp Integration
Mailchimp Integration add-on can automatically add the buyer’s email address to your chosen Mailchimp audience/list after a PayPal Checkout payment.
Custom Input
Custom Input add-on shows a text box with your PayPal Checkout buttons. The text box can be used to collect custom data from buyers at checkout. This is really useful if a buyer would like to include a custom note or special instructions.
Contact Form 7 Integration
Contact Form 7 Integration add-on can show a pre-configured PayPal Checkout button after a form submission. This allows buyers to make payments after a Contact Form 7 type form is submitted.
Product Variations
Product variations add-on can be used to set up variations for your PayPal Checkout buttons.
Order Export
Order Export add-on can be used to export order data to a CSV file.
Get All WP PayPal Add-ons
* Buy Now Custom Amount
* Buy Now Discount
* Custom Input
* Product Variations
* Variable Price
* Variable Quantity
* Variable Subscription
* Mailchimp Integration
* Contact Form 7 Integration
* Custom Donations
* Order Export
License: Unlimited Websites
Note:
* Do not purchase before setting up the core plugin first. The add-on is not at fault if the core plugin does not work on your website.
* Do not purchase if you are not sure about a feature, contact us instead.
* Do not purchase to ask for more features or make the product work in a certain way.
PayPal Payments Standard
With the PayPal Payments Standard payment method, you can create wide range of buttons to accept both one-time and recurring subscription payments with our plugin.
In order to create a button, you need to insert a shortcode and specify the type in the button parameter.
Buy Now
[wp_paypal button="buynow" name="My product" amount="1.00"]
Add to Cart
[wp_paypal button="cart" name="My product" amount="1.00"]
View Cart
[wp_paypal button="viewcart"]
Donation
[wp_paypal button="donate" name="My product"]
Subscription
[wp_paypal button="subscribe" name="My product" a3="1.00" p3="1" t3="M" src="1"]
For subscription setup see how to create a subscription button in WordPress.
PayPal Payments Standard Button Demo
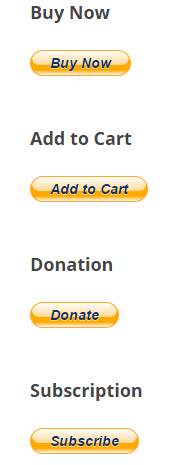
PayPal Payments Standard Shortcode Parameters
Button Image
“button_image” parameter can be added to the shortcode to show your own button image instead of the default PayPal button. For example:
[wp_paypal button="buynow" name="My product" amount="4.99" button_image="https://example.com/images/buy.png"]
Button Text
“button_text” parameter can be added to the shortcode to show a plain PayPal button. For example:
[wp_paypal button="buynow" name="My product" amount="4.99" button_text="Pay Now"]
Shipping
“shipping” parameter can be added to the shortcode to charge shipping for an item. For example:
[wp_paypal button="buynow" name="My product" amount="4.99" shipping="1.75"]
Shipping2
“shipping2” parameter can be added to the shortcode to charge shipping for each additional unit of an item. For example:
[wp_paypal button="buynow" name="My product" amount="4.99" shipping="1.75" shipping2="0.75"]
This means, If a user orders:
My Product (Quantity 1), total shipping would be $1.75.
when the order becomes:
My Product (Quantity 2), total shipping would be $1.75 + $0.75.
When it contains:
My Product (Quantity 3), total shipping would be $1.75 + $0.75 + $0.75.
And so on.
This feature is also very useful if you want to offer shipping at a discounted rate for each additional item.
Weight
“weight” parameter can be added to the shortcode to specify the weight of an item. For example:
[wp_paypal button="buynow" name="My product" amount="4.99" weight="2.20"]
If you have profile-based shipping enabled in your PayPal account and the shipping rates are configured with a basis of weight, the sum of weight values is used to calculate the shipping charges for the payment.
Weight Unit
“weight_unit” parameter can be added to the shortcode to specify the unit of weight. Supported values are: lbs, kgs. The default is “lbs” whether or not this parameter is present. For example:
[wp_paypal button="buynow" name="My product" amount="4.99" weight="2.20"]
[wp_paypal button="buynow" name="My product" amount="4.99" weight="2.20" weight_unit="lbs"]
[wp_paypal button="buynow" name="My product" amount="4.99" weight="2.00" weight_unit="kgs"]
Tax
“tax” parameter can be added to the shortcode to specify a flat tax amount for an item. For example:
[wp_paypal button="buynow" name="My product" amount="4.99" tax="2.15"]
Tax Rate
“tax_rate” parameter can be added to the shortcode to specify a tax rate for an item. For example:
[wp_paypal button="buynow" name="My product" amount="4.99" tax_rate="2.9"]
Handling Fees
“handling” parameter can be added to the shortcode to charge handling fees for an item. For example:
[wp_paypal button="buynow" name="My product" amount="4.99" handling="2.50"]
This parameter is not quantity-specific. That means the same handling cost applies, regardless of the number of items on the order.
Success Page
“return” parameter can be added to the shortcode to redirect the user to a specific page on your site after the payment. For example:
[wp_paypal button="buynow" name="My product" amount="4.99" return="https://example.com/thank-you"]
Cancellation Page
“cancel_return” parameter can be added to the shortcode to redirect the user to a specific page on your site if they cancel checkout before completing the payment. For example:
[wp_paypal button="buynow" name="My product" amount="4.99" cancel_return="https://example.com/payment-canceled"]
Currency
To use a different currency code than the one you specified in the settings, you can add the “currency” parameter to the shortcode. For example:
[wp_paypal button="buynow" name="My product" amount="4.99" currency="SGD"]
Show/Hide Shipping Address
“no_shipping” parameter can be added to the shortcode to control whether or not to prompt buyers for a shipping address. Allowable values are,
- 0 – Prompt for a shipping address but do not require one (This option is set by default)
- 1 – Do not prompt for a shipping address
- 2 – Prompt for a shipping address and require one
For example:
[wp_paypal button="buynow" name="My product" amount="4.99" no_shipping="1"]
Shopping URL
“shopping_url” parameter can be added to the shortcode to redirect buyers to a page when they click the Continue Shopping button on the PayPal Shopping Cart page. This parameter can only be used with an Add to Cart/View Cart button. For example:
[wp_paypal button="cart" name="My product" amount="4.99" shopping_url="https://example.com/shop"]
Allow Buyers to Specify the Quantity
“undefined_quantity” parameter can be added to the shortcode to allow buyers to specify the quantity of the item on the Paypal payment page. This parameter is only used with a Buy Now button. For example:
[wp_paypal button="buynow" name="My product" amount="4.99" undefined_quantity="1"]
Open PayPal Button in a New Window/Tab
“target” parameter can be added to the shortcode to open a PayPal button in a new window or tab. For example:
[wp_paypal button="buynow" name="My product" amount="4.99" target="_blank"]
Change a PayPal Button Dynamically
If you have a page containing a single “[wp_paypal]” shortcode button, you can dynamically change the product name and price of the button with query strings in the URL.
https://example.com/button/?wppp_name=product&wppp_amount=2.99To represent a space you can use “%20”.
https://example.com/button/?wppp_name=My%20Product&wppp_amount=2.99This can be useful when you have a separate checkout page with one button and users from other pages of your site are sent to this page to make payments for different products. If you have a form that sends users to different product pages based on the selection, you can just send them to one page by changing the parameters.
This feature is only available for Buy Now type buttons.
PayPal Payments Standard Add-ons
PayPal Payments Standard payment method comes with various add-ons that you can use to enhance its functionality on your website.
Buy Now Custom Amount
Buy Now Custom Amount add-on lets buyers set the amount they will pay for your PayPal Buy Now buttons. It can also be used to give buyers a choice of pre-defined prices.
Buy Now Discount
Buy Now Discount add-on lets you offer various automatic discount options with your PayPal Buy Now buttons.
Custom Input
Custom Input add-on shows a text box with your PayPal Payments Standard buttons. The text box can be used to collect custom data from buyers at checkout. This is really useful if a buyer would like to include a custom note or special instructions.
Product Variations
Product variations add-on can be used to set up variations for your PayPal Payments Standard buttons.
Variable Quantity
Variable Quantity add-on lets buyers enter a quantity for your PayPal Buy Now buttons.
Variable Subscription
Variable Subscription add-on lets buyers set the amount they will pay for your PayPal Subscribe buttons. It can also be used for accepting recurring donation payments.
Mailchimp Integration
Mailchimp Integration add-on can automatically add the buyer’s email address to your chosen Mailchimp audience/list after a PayPal payment.
Contact Form 7 Integration
Contact Form 7 Integration add-on can show a pre-configured PayPal Payments Standard button after a form submission. This allows buyers to make payments after a Contact Form 7 type form is submitted.
Custom Donations
Custom Donations add-on allows visitors to set a donation amount for your WP PayPal donate buttons.
Order Export
Order Export add-on can be used to export order data to a CSV file.
Get All WP PayPal Add-ons
* Buy Now Custom Amount
* Buy Now Discount
* Custom Input
* Product Variations
* Variable Price
* Variable Quantity
* Variable Subscription
* Mailchimp Integration
* Contact Form 7 Integration
* Custom Donations
* Order Export
License: Unlimited Websites
Note:
* Do not purchase before setting up the core plugin first. The add-on is not at fault if the core plugin does not work on your website.
* Do not purchase if you are not sure about a feature, contact us instead.
* Do not purchase to ask for more features or make the product work in a certain way.
Manage PayPal Orders
When you receive a new order it will appear in the Orders menu. You can then do the following to finalize it:
1) Send a purchase confirmation email to the customer (include download links if applicable)
2) Ship the goods

Additional Resources
Subscription Button
Frequently Asked Questions
Why is my PayPal payment pending?
If you have sent a PayPal payment that is pending, it’s possible the recipient hasn’t accepted it yet. This may happen if the recipient’s account is configured to review each payment that they receive. It can also happen if the payment is made in a currency that is different from the recipient’s primary currency. In that case the recipient will need to manually review the payment by either converting it to the primary currency or create a new balance in the payment currency. If recipient approves the payment once they will be able to receive payments in that currency in the future automatically.

If someone wants to cancel a subscription – what is the process? If someone cancels a renewal on paypal do thy just get deleted from the orders page?
@David, the plugin doesn’t automatically do anything if a subscription is cancelled or renewed.
Please help the button_image and target doesnt work.
My code looks like this:
[wp_paypal button="donate" name="SPORTS Donate" target="_blank" button_image="http:example.com/image.jpg"]@Kurt, Please provide a link to the page in question so I can take a look. Did you copy and paste the shortcode as plain text in the visual editor? It might be broken if there are hidden formatted characters in it.
Hi,
I have installed the following add-ons: “Affiliates Manager Paid Membership Pro Integration” and “Affiliates Manager Simple Membership Integration”. Are they compatible with WP PayPal subscription button for subscriptions and recurring payments? Who of them will work exactly? Should I put extra code in the WP PayPal shortcode?
@Petya, Unfortunately WP PayPal doesn’t have integration with Affiliates Manager at the moment.
Thank you for the information!
Such integration would facilitate the work of webmasters. 🙂
I’ll follow your blog with pleasure.
Best Regards
Hi, the button_image is not working for me as well. I have done all code in the text window and not visual. Deleted and recreated numerous times. Please help!
Here is my shortcode for a payment plan to occur 3 times, every 2 weeks.
[wp_paypal button=”subscribe” name=”Payment Plan” amount=”1.00″ recurrence=”2″ period=”W” src=”1″ srt=”3″ button_image=”http://loaskillscamp.com/wp-content/uploads/2017/07/enroll-button.jpg”]
@Erika, Please provide a link to the page in question so I can take a closer look.
hi is there a way to add a Donate option the Subscribe screen so people can make a donation of their choice paying subscription at the same time?
@claude, I don’t think that’s possible. If PayPay supports this feature I should be able to integrate it into the plugin.
I already have Paypal working – somewhat – on my client’s site. However, once the payment is received, the purchaser is not receiving the email with the link to the pdf that is to be downloaded. I’ve tried logging into Sandbox but am not having any luck. Can I use this plugin just to test the links I already have for Paypal?
@jan, This plugin doesn’t automatically send a confirmation email once the purchase is complete. Also you will need to use a shortcode to create a new button for it (it can’t be integrated with another one).
The button image and target=”_blank” not working for my site, could u lend me a hand?
Here’s my test page :
http://www.wanderer-studio.com/test/test-paypal/@Ken, I can see the code in the button. So I’m not sure why it’s not working.
Thank you ! It’s working now ! This is a very great plugin, saving me a lot of time integrating paypal checkout 😀
Easy and understandable plugin to use. Thanks for this plugin.
I would like to know how to cancel the subscription?
My user is active on one plan. How he will cancel it?
@viji, Unfortunately, there is no button in the plugin to cancel a subscription. However, the user should be able to cancel it from their PayPal account.
I have successfully added an Add to Cart and donation button. The donation one works correctly. However, the add to cart gives me an error which says “Things don’t appear to be working at the moment. Please try again later.”
Here is my code:
[wp_paypal button="cart" name="My product" amount="4.99" target="_blank"]

[wp_paypal button="donate" name="My product" target="_blank"]
@Holly, PayPal made some changes to their payment page recently. This is causing their Add to Cart button to not function properly. I believe they will fix this issue soon. In the meantime, you can use a buy now button instead.
How do I center the buttons on the page instead of being left justified? I have tried using the center justification button and all that does is center the text, I want the button in the cneter of the page.
@James, Please provide a link to the page in question so I can check the PayPal button elements.
how can i do sandbox testing, I have enable test mode in plugin setting and put sandox reciever email but when trying to login with buyer email its showing error.
@user62402, What error do you get? What type of button are you using? It seems to be working fine for me.
I am using buy now button how sandbox testing can be done, I have enabled in plugin option and also I want to add other second option in this like my product2 and 3 with different amount where I can put this.
[wp_paypal button="buynow" name="My product1" amount="4.99" undefined_quantity="1"]This is beautiful plugin!
Everything is working fine. But when i used sandbox account then orders information is not showing in Orders section.
Anyone tell me what happen for sandbox account?
@Umair, The plugin does process orders in test mode. Do you have the debug option enabled in the WP PayPal settings?
@admin, yes i have enabled debug mode on. But does not display payment information.
@Umair, Please reset the log file and do a test purchase so I can check it afterward.
@admin, I have checked everything. but still not showing orders information in order table.
@Umair, Can you please provide a link to the page where you have the button? Chances are that PayPal is not being able to send the notification to your site. Login to developer.paypal.com and send a test IPN to your site to make sure that It’s working.
@admin,
I have set payment button in below page.
http://creato.website/joshpyatt/elevate-2018/And can you tell me what is the IPN and how to i set?
@admin,
Thank you so much issue resolved.
I hearty appreciate your response and your work.
@Umair, Glad to hear that you got it to work. But how did you resolve this issue?
@admin, I have set the Notification URL in (IPN) section.
According to your information.
is there a way to add a processing fee?
@Rafael, What type of button are you using?
This is what I have so far
[wp_paypal button="buynow" name="My product" amount="1000.00" no-shipping="1" target="_blank" return="https://example.com"]@Rafael, I couldn’t find any variable to accept fees on the PayPal Standard documentation page. However, there is a variable named “handling” to apply handling charges to an item. I have updated the documentation so you can use this parameter in the shortcode.
Hi,
The language site is set to French but the text on the button is in English. I had a look to your cde en see that the translation is already available. Any idea why it’s not showing the good information?
Thanks,
@Julie, The text is automatically generated by the PayPal library for each button. That’s why no translation is available for it. You can use a button image instead with the translated text in it.
Hi. In the next update, can you add a shortcode parameter that takes the text to display? It would be cleaner than writing the text as an image.
If we have a multilingual website, it would be better to auto-detect the language so we don’t have to duplicate the button code.
Can I create a donate field that allows a customer to input the value they wish to donate?
I’m not seeing the test orders going to the Orders table. I did a test IPN from developer.paypal.com and get the success message “IPN was sent and the handshake was verified” but there are still no orders in the table and nothing gets saved to the debug log even though it is on.
IPN was sent and the handshake was verified.
http://thebeatpolkaband.com/2017/11/latest-recording-the-question-now-available-for-purchase/Thanks in advance!
@dwadek, Try sending a test IPN to
http://thebeatpolkaband.com/?wp_paypal_ipn=1and see if it writes anything to the log file.Yes, using that URL to do the test IPN did log an entry in the debug log file, but there is still nothing in the orders table.
Upon further review, I saw at the very bottom of the debug log:
[November 16, 2017 1:11 pm] – FAILURE :Seller PayPal email ([myselleremailacct]@gmail.com) and Receiver PayPal email (seller@paypalsandbox.com) do not match. This payment cannot be processed.
I changed this in the IPN test and now do see the entry in the debug log.
After that I went back and did another test transaction from my page and all goes through on the Paypal sandbox side, in the debug log I did see this:
[November 16, 2017 1:20 pm] – SUCCESS :Received valid response from PayPal
[November 16, 2017 1:20 pm] – SUCCESS :Payment Status – Pending
[November 16, 2017 1:20 pm] – FAILURE :This payment cannot be processed
Edit: I changed this [the email accts.] in the IPN test and now do see the entry in the *orders table*.
@dwadek, Glad to see that everything is working now.
I should have been more clear that after that I went back and did another test transaction from my page and all goes through on the Paypal sandbox side, in the debug log I did see this:
[November 16, 2017 1:20 pm] – SUCCESS :Received valid response from PayPal
[November 16, 2017 1:20 pm] – SUCCESS :Payment Status – Pending
[November 16, 2017 1:20 pm] – FAILURE :This payment cannot be processed
And the successful transaction DOES NOT make it back to the orders table
@dwadek, Login to your PayPal account to see why the payment is pending. Once it goes to the “completed” state the order will be processed by the plugin.